Kubernetes setup
Get your cluster config
Fetch your kube config file from the OVH Manager and save it in your local folder.
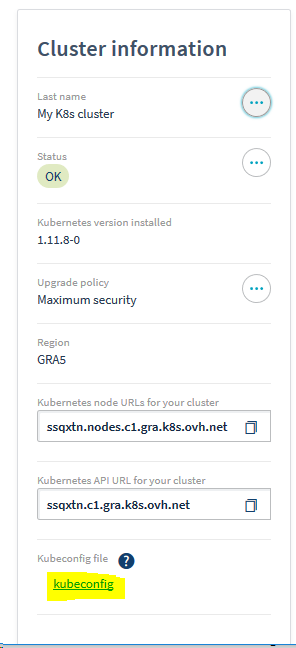
or via the OVH API https://api.ovh.com/console/#/kube/%7BserviceName%7D/kubeconfig#GET

Note: If you are using the API UI, you need to copy/paste the response in kubeconfig.yaml and run sed -i 's/\\n/\n/g' kubeconfig.yaml
Next, set the KUBECONFIG environment variable.
export KUBECONFIG=`pwd`/kubeconfig.yaml
and check that you can access your cluster. Be sure to install kubectl first.
export PATH=`pwd`:$PATH
kubectl cluster-info
Add nodes
Check that you can connect and start adding your node, either via the OVH manager
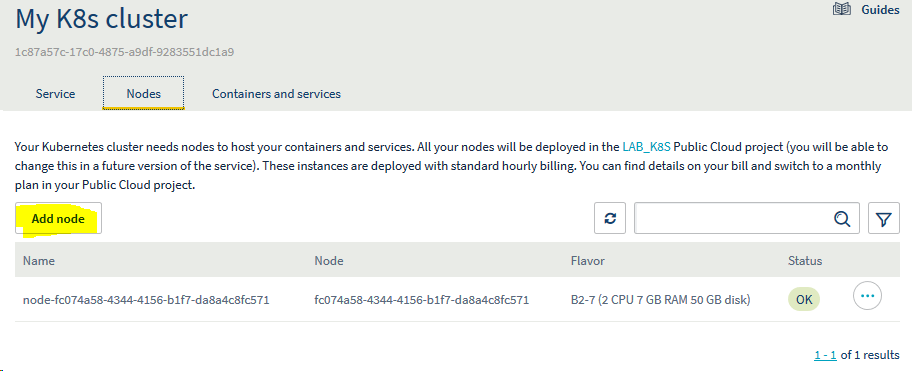
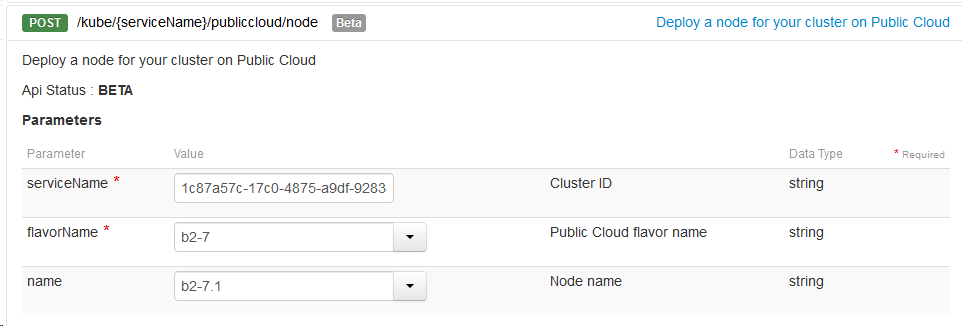
or the OVH API https://api.ovh.com/console/#/kube/%7BserviceName%7D/publiccloud/node#GET
kubectl get nodes
Helm/Tiller
Next, to simplify our deployement, we’ll use helm.
Helm is a tool for managing packages of pre-configured Kubernetes resources known as charts.
It has two componenents:
- a local client
helmto install in your local environment. - a Kubernetes service
tiller.
Configure RBAC for Tiller
To allow tiller to manager the chars, we need first to create a ServiceAccount and give it cluster-admin rights.
The full doc is available here
cat > config.yml <<EOF
apiVersion: v1
kind: ServiceAccount
metadata:
  name: tiller
  namespace: kube-system
---
apiVersion: rbac.authorization.k8s.io/v1
kind: ClusterRoleBinding
metadata:
  name: tiller
roleRef:
  apiGroup: rbac.authorization.k8s.io
  kind: ClusterRole
  name: cluster-admin
subjects:
  - kind: ServiceAccount
    name: tiller
    namespace: kube-system
EOF
kubectl apply -f config.yml # apply config
Init helm
Use the --upgrade if tilleris already installed. Be sure to install helm first.
export PATH=`pwd`:$PATH
helm init --upgrade --service-account tiller # deploy the service in the remote cluster
kubectl get pods -n kube-system -l app=helm # check that the pod is up and running
helm version # check that both client and server version are the same
helm repo update # Update the helm package list